Download MS Office 2019 using command prompt
MS Office 2019 is the latest version of Office launched by Microsoft. MS Office is a complete suite that comes with several necessary office useful applications, such as – Word, PowerPoint, Excel, Access, OneDrive, etc. It can be downloaded through the command prompt.
MS Office is now also available on the internet. It means you can access MS Office applications on the web from anywhere.
Note: MS Office is available for both 32 and 64-bit Windows operating system.
This chapter will show you the steps to download the MS Office suite on Windows operating system using commands. In this chapter, we will also discuss the error that may occur during downloading and configuring MS Office through cmd.
Features of MS Office 2019
You can take advantage of the following features of MS Office:
- Collection of office use applications, MS Word, PowerPoint, Excel, Access, and more.
- Simple and easy to use with several interesting features.
- Office applications offer a ribbon interface to access features easily.
- Lightweight and powerful tool.
- Allows pictorial representation of data through pictures, videos, pie charts, graphs.
- In-built formulas with Excel spreadsheets.
Things to be remembered while installing MS Office
Before moving forward, you must check on the following things on your computer system for an error-free process.
- Your system must be connected to the internet and speed should be good.
- Your system must have enough memory space, at least the size of the MS office.
- If your system already has the same or another version of MS Office, uninstall it before installing the new one.
Steps to download and install the MS Office
Following are the steps to download and install the MS Office 2019 using the command prompt on Windows 10:
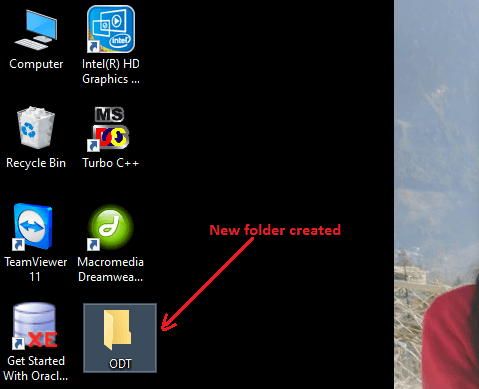
Step 1: Create a folder named ODT on your desktop or any location where you want to download the MS Office.

We have two versions for Office 2019: Office standard 2019 and Office Professional Plus 2019.
Step 2: Choose an MS Office software that you want to install from the given list. These are available for a different bit of operating systems.
Office standard 2019
Configure for 32-bit computers
Configure for 64-bit computers
Office Professional Plus 2019
Configure for 32-bit computers
Configure for 64-bit computers
Step 3: When you click on one of the links, a configuration file (configuration.xml) will open on your web browser.

Step 4: Download this file on your system by clicking on the Download button present near the top right corner.

Step 5: Your configuration file will download in a few seconds. A popup that you see here, close it by clicking the “cross” sign.

Step 6: Now, move the downloaded configuration.xml file to the ODT folder that we have created in earlier steps.

Step 7: Click on the address bar of the ODT folder to edit it. Type cmd and press the Enter key.

Step 8: Windows command prompt will open with a location of the ODT folder, as showing below.

Step 9: Now, copy and paste the following command to install the Office in your system.

This command may take minimum 10 minutes to complete running. It will seem like nothing is going on and downloading, but files are downloading in the background.
Wait till complete!
Note: Your system must be connected to the internet. Otherwise, MS Office will stop downloading and give an error message.
Step 10: Office has been downloaded on your system successfully inside the ODT folder. Its setup will show you inside the ODT folder where your configuration.xml file was stored.

Step 11: Whereas command prompt finishes the execution of command running on it. Once the first command has been executed without any error, the command prompt will look the same as below.

Error: Couldn’t install
If it is unable to install Office on your system and shows a message: couldn’t install along with an error code, it means your Office setup is not installed.

This error can be occurred because one of the following reasons. So, check them once:
- Internet connectivity
- System having enough memory space.
Error Codes
- If the Error code is: 30183-2056, check the internet connectivity. This code is generated due to low internet speed or no internet.
- If the Error code is: 30029-1007 (O), check the file name of the configuration file inside the ODT folder.
Step 12: If the previous command is run successfully, then no error has occurred. Run the one more command given below:

Hit the Enter key.
Step 13: When this command will execute, your Office 2019 will gets configured successfully and ready to run.

Step 14: It starts installing to your system. Once it is done, you can use MS Excel and other Office applications too.

Error while configuring configuration.xml
When you execute the “setup /configure configuration.xml ” command, it takes few minutes to install MS Office. Unfortunately, you can face an error (We can’t install) one more time after running the second command.
This type of error may occur while installing MS Office onto your system, if your system is already having MS Office installed on your system.

This error indicates that your system is also containing the other/same version of the following product. Thus, you have to uninstall them first before configuring the Excel setup.
Use the MS Office application
If everything goes perfectly, you can search for the applications offered by MS Office in the start menu and run them. Applications come with by MS Office suite are –
- MS Word
- MS PowerPoint
- MS Excel
- MS Access
- OneNote
- Outlook
Inside the Start menu, you can find all these applications.
